
APIs, or Application Programming Interfaces, enable different software applications to communicate with each other effortlessly. APIs will add convenience to your end users, but you don’t want to deploy a buggy API.
Doing so could disrupt your workflow and could even lead to issues with your customers. That’s why it’s important that your APIs go through thorough testing before deployment, so you can avoid bugs or performance issues that will disrupt seamless communication.
So, let’s check out how you can test API requests on Short.io via the API reference portal. That way, you can ensure that your it will work with no issues once it goes live.
How to Test API Requests via the API Reference Portal
Testing API requests involves coding, which generally would be too challenging for beginners. Thankfully, Short.io allows regular users to test their API requests via an API portal. Here’s a step-by-step guide to testing API requests using the API Reference portal with Short.io:
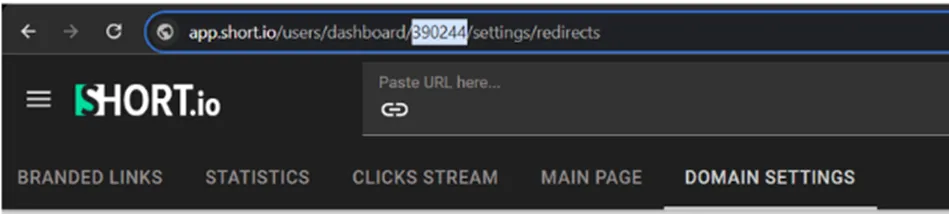
Step 1: Obtain the Domain Code
- Log in to your Short.io account.
- Click Domain Settings.
- Locate the domain code on the address bar between /dashboard/ and /settings/ and copy it. You may refer to the highlighted numbers in the image below as a reference.
Step 2: Create an API Key
- Click on the menu icon In the Short.io dashboard.
- Select “Integrations & API” from the menu.
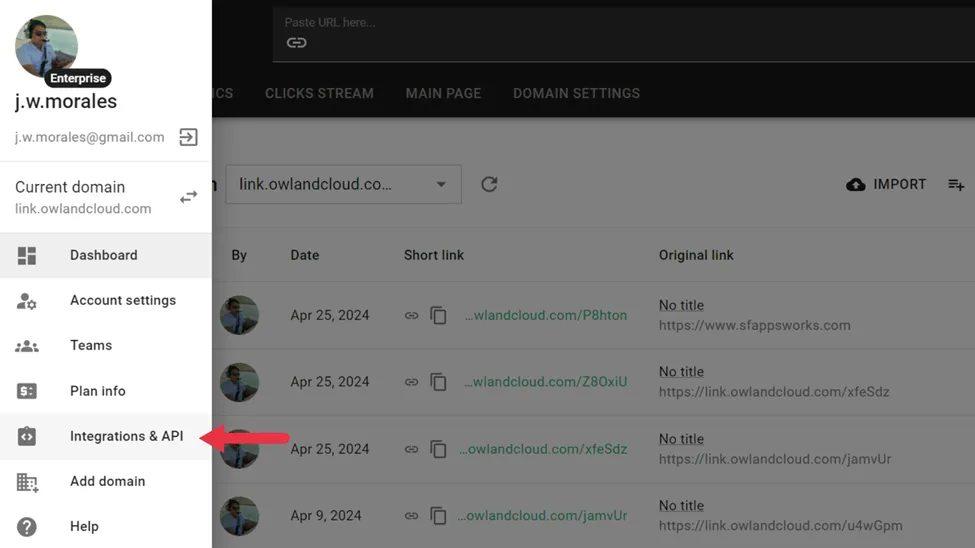
- Under the Short.io API section, click on Create API Key.
- Fill in the following details:
- Under “Key Description,” enter a name for your API key (e.g., “testing”).
- Once you’ve entered the details, click the “Create” button.
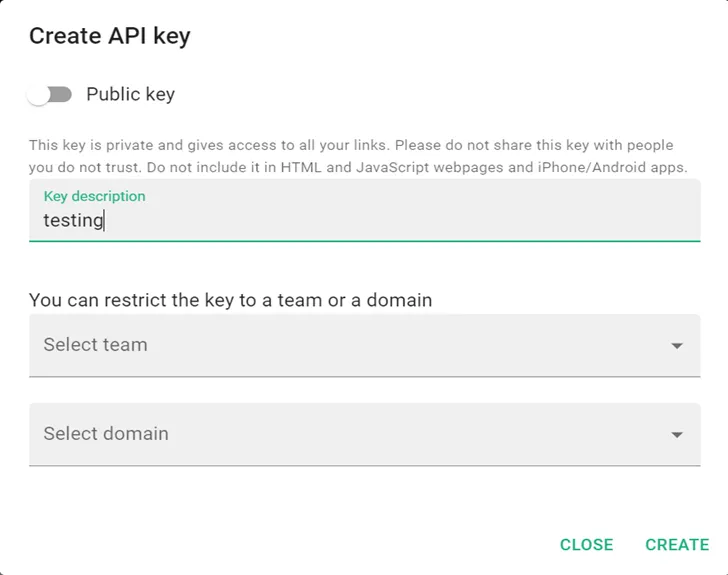
- Save the API key that appears.
Note: You cannot retrieve this key again once you navigate away from this page.
Step 3: Test API Request
- Navigate to Short.io API Reference.
- Set Up Authorization:
- Under the “Authorization” section, place the API key on the “Header” field.
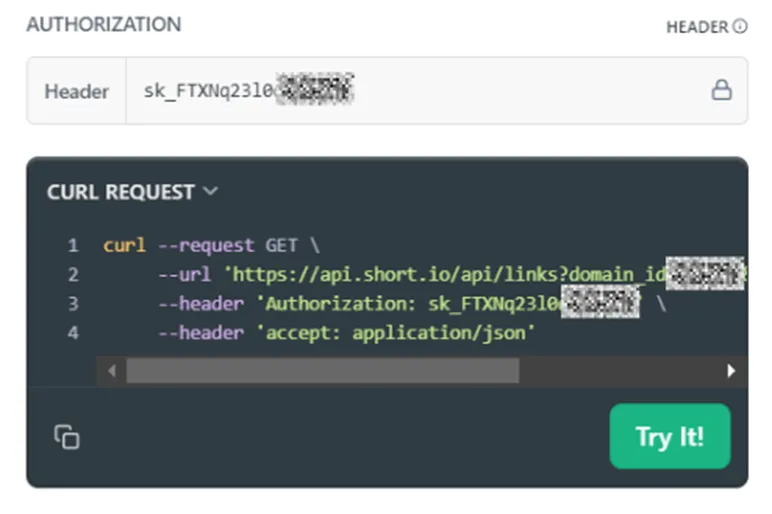
- Input the domain ID string (the code you copied in Step 1) into the domain_id field.

- Set additional parameters for your request, such as:
- limit: to set the number of links to retrieve (up to 150).
- beforeDate: to filter links created before a specific date.
- afterDate: to filter links created after a set date.
- dateSortOrder: to specify the sort order for the dates (e.g., “desc” for descending).
- pageToken: to help you paginate through the results.
- Click the “Try It!” button to execute the request.
Step 4: Review the Response
- Once the request is executed, review the results in the output section.
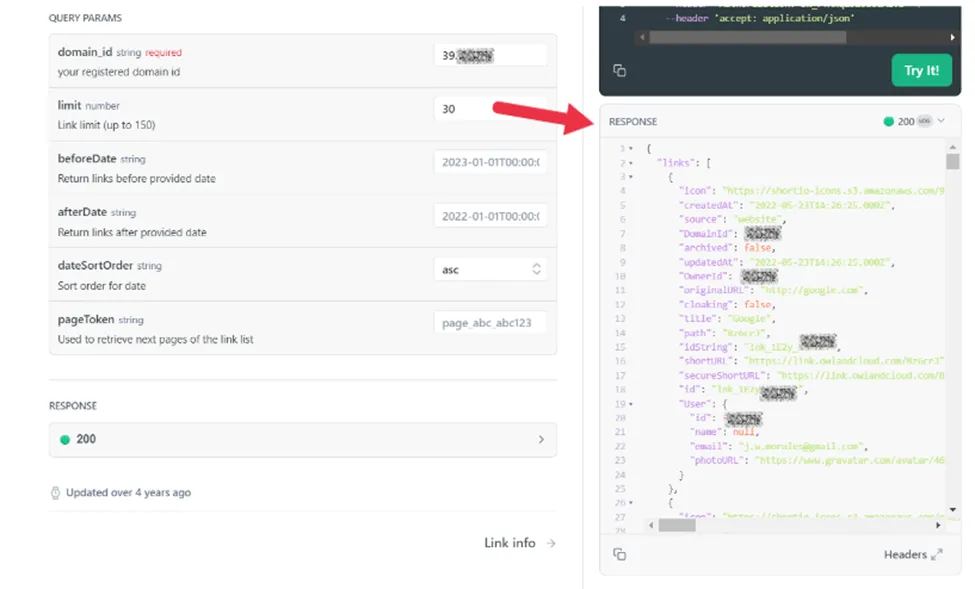
- Check the data, which includes relevant link details such as:
- Link icons
- Creation dates
- Source and slug suggestions
- Domain IDs and owner IDs
- URLs and other metadata
With these steps, you can successfully test API requests on Short.io’s API Reference portal and retrieve detailed information about your links. If you have any questions or need further assistance, feel free to reach out for support.
What Is an API Request?

An API request is like sending a specific message to a server, asking it to do something for you or provide relevant data. Imagine it as ordering food at a restaurant, with the different elements below:
- The Endpoint URL indicates where the API is hosted. It’s like the address of the restaurant where you place your order.
- The HTTP Method specifies the action to be performed, such as GET, POST, PUT, or DELETE. It’s what you want to do at the restaurant, like ordering food (GET), making a reservation (POST), changing your reservation (PUT), or canceling it (DELETE).
- Headers include additional information passed with the request, such as content type or authentication details. Following our restaurant analogy, these are extra details you provide with your order, such as confirming your identity or a specific dietary preference.
- Query parameters are key-value pairs sent to the URL to filter or modify the request. These are special instructions you give with your order, such as asking for no onions or extra sauce.
- The Body indicates the data sent with the request, usually in POST or PUT requests. This is the central part of your order, detailing the food you want to buy. Here, you can create more complex requests like making a reservation or placing a large order.
API requests allow different software programs to communicate with each other and exchange information, which is crucial for making various systems and applications work together smoothly.
The Importance of API Testing

API testing ensures your APIs work correctly, securely, and efficiently. Here’s why it’s essential and what it involves:
Ensuring Functionality
API testing involves verifying that the endpoints respond as expected and generate the correct responses for valid requests. Additionally, it’s essential to test various scenarios and edge cases to uncover bugs that might not be apparent during everyday use.
By rigorously testing these parameters under different conditions, we can identify potential issues early on and ensure robust API performance.
Validating Input and Output
Validating both input and output is another crucial aspect of API testing. Check that the input parameters are processed correctly to verify that the API handles all inputs as expected with accurate and relevant data. This ensures the returned information is correct and helpful for the end-users, providing a reliable service.
Assessing Performance
Assessing an API’s performance involves measuring response times under different loads. This helps determine how well the API performs under stress and ensures it can handle high traffic without issues.
Identifying bottlenecks and optimizing API performance is also crucial to improving overall efficiency and ensuring the API runs smoothly, even under heavy use.
Ensuring Security

Security is a fundamental concern when it comes to APIs. Testing for vulnerabilities such as injection attacks or unauthorized access secures the API against common threats. Security measures are essential to protect sensitive data and maintain user trust.
Compatibility Testing
Compatibility testing ensures the API works seamlessly with different client applications and environments, especially across various platforms and devices.
Testing API integrations with other systems also helps ensure smooth operation and prevent issues when the API is part of a larger ecosystem.
Handling Errors Gracefully
Implementing error-handling mechanisms provides meaningful responses, ensuring users receive valuable feedback when something goes wrong.
Testing error scenarios is crucial to ensure appropriate handling and clear communication of issues to users, maintaining their trust and confidence.
Documentation and Onboarding

Validating API documentation accurately reflects the API’s behavior and ensures it is up-to-date and helpful—contributing to developer success.
Facilitating smooth onboarding for developers by providing reliable APIs helps new users get started quickly and efficiently, promoting wider adoption and satisfaction.
Continuous Improvement
Finally, continuous API maintenance and improvement keeps it relevant and effective. This involves iteratively testing and refining its functionality based on user feedback, and regularly updating the API to enhance performance and functionality.
Implementing automated testing can optimize this process, making it faster and more reliable and allowing for more frequent updates and improvements.
Short.io and API
With Short.io’s API portal, testing API requests is a breeze. Validate functionality, security, and performance to ensure seamless communication between apps and services. Simplify testing and improve your API integration experience today with Short.io!